
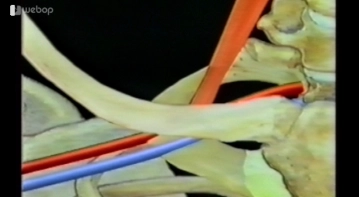
Demonstration of the anatomical position of the scalene muscle, subclavian/brachial artery and vein, and the position of the clavicle in relation to the artery and vein.
-
Topography of the Subclavian Vein
![Topography of the Subclavian Vein]()
Soundsettings -
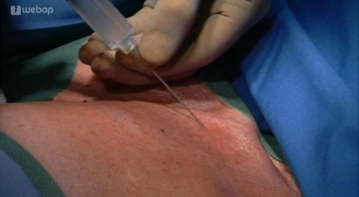
Infiltration of the Surgical Area with Local Anesthetic
![Infiltration of the Surgical Area with Local Anesthetic]()
Soundsettings Puncture approximately one fingerbreadth below the clavicle, about in the middle of the clavicle, for the application of a total of 10 ml of local anesthetic as a wheal and subclavicularly.
Puncture of the Subclavian Vein
Puncture with the needle initially directed at 70-90° towards the clavicle, then change the di
Puncture with the needle initially directed at 70-90° towards the clavicle, then change the di
Activate now and continue learning straight away.
Single Access
Activation of this course for 3 days.
US$9.10
inclusive VAT
Most popular offer
webop - Savings Flex
Combine our learning modules flexibly and save up to 50%.
from US$7.08 / module
US$85.05/ yearly payment
general and visceral surgery
Unlock all courses in this module.
US$14.17
/ month
US$170.10 / yearly payment
Webop is committed to education. That's why we offer all our content at a fair student rate.