A distinction is made between one-handed and two-handed knots. In the one-handed technique, one hand keeps the thread constantly under tension or pull, while the other hand ties a knot or a loop. In the two-handed technique, both hands tie equally and thus create a secure knot more directly (see film on surgical knot). Disadvantages of the two-handed technique are the lack of tension on both thread ends and the more difficult learnability.
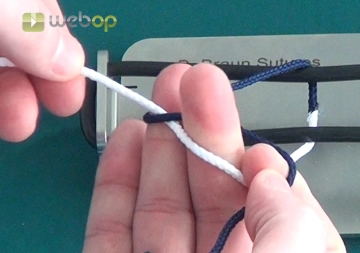
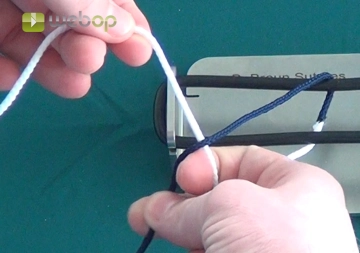
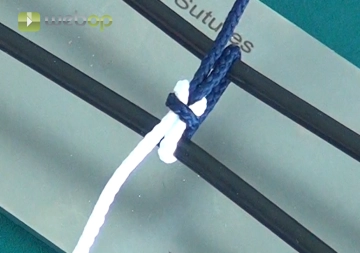
The one-handed technique alternately combines the index finger and middle finger knots. A secure knot is achieved by changing the pulling hand/pulling thread.
The advantages of this technique are the higher tying speed, continuous maintenance of thread tension (which is particularly helpful in depth, for example in the small pelvis), and easier learnability. In general, only two superimposed loops (i.e., two knots) ensure a secure knot. The two first loops are finally fixed by changing the pulling hand/pulling thread. The first loop determines the tension on the tissue, the second fixes the first on it.
In the following video sequences, the basic techniques for the one-handed knot technique are presented from the perspective of the right-hander. The “pulling thread” is always in the left hand and the “tying thread” in the right hand.