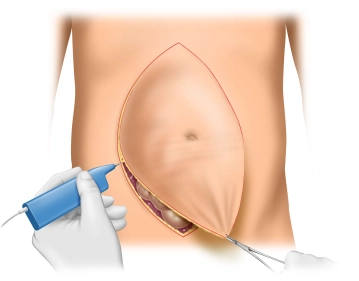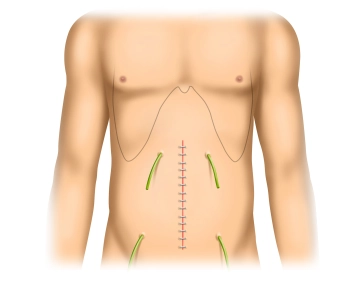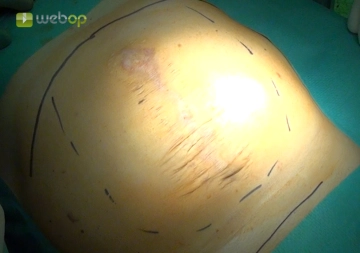
Before the skin incision, the landmarks are marked with a skin marker. These are:
- Costal arch
- Symphysis
- Hernia gap
- if applicable, incision line
Start your free 3-day trial — no credit card required, full access included
 readingtime 19:18 min.
Before the skin incision, the landmarks are marked with a skin marker. These are:
Generous wedge-shaped excision of the scar with significantly excess skin from the xiphoid to the symphysis, with the abdominal cavity being opened. Concurrently, adhesiolysis of adherent intestinal loops is performed.
Systematic adhesiolysis along the abdominal wall laterally up to the level of the anterior axillary line to avoid unnoticed bowel injury during interparietal preparation of the abdominal wall layers.
If there is no history of passage problems or recurrent ileus conditions, interenteric adhesiolysis can be omitted.
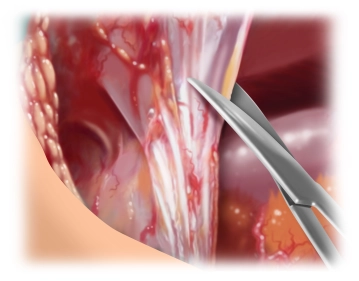
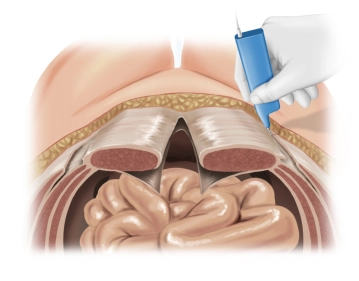
The posterior rectus sheath is visualized and incised longitudinally as close as possible to the medial edge. Then, preparation of the retro-muscular space by bluntly detaching the rectus muscles from the posterior layers of the rectus sheath. Laterally, the preparation is continued until the neurovascular bundles are reached. These must be preserved at all costs and represent the lateral boundary of the preparation.
This preparation extends from retroxiphoid to retropubic into the space of Retzius.
Note:
Below the arcuate line, the extraperitoneal space can be bluntly opened up to behind the symphysis.
Cranially, sharp detachment of the posterior layer of the rectus sheath from the xiphoid by transverse incision on both sides of the linea alba over a length of approximately 5 cm. This allows access to the preperitoneal space. The preperitoneal fat tissue appears as the so-called "fatty triangle." See also our contribution to Incisional hernia surgery with open, retromuscular mesh augmentation
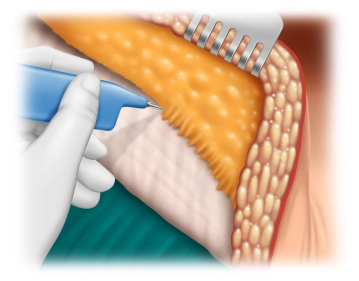
Detachment of the subcutaneous tissue from the anterior rectus sheath laterally to reach the myofascial transition of the external oblique muscle.
After extensive presentation of the external aponeurosis, a longitudinal incision of the external aponeurosis is made approximately 1 cm lateral to the lateral rectus sheath. This is done along the entire length from below the anterior superior iliac spine cranially to 2-3 cm beyond the chondrocostal border.
After the incision of the external aponeurosis, the separation of the external oblique muscle from the internal oblique muscle takes place. This usually occurs without difficulty, as this is an avascular area. The dissection should proceed laterally to the extent that tension-free medial shifting of the rectus muscle and unification with the opposite side is possible.
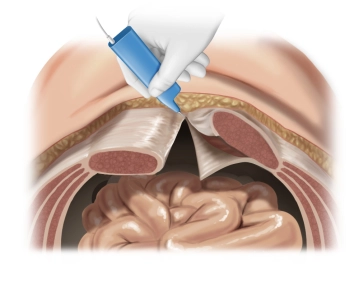
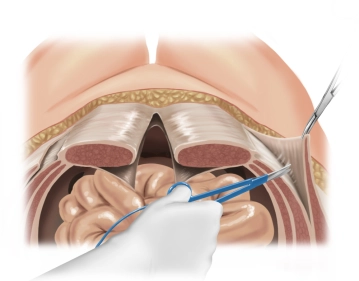
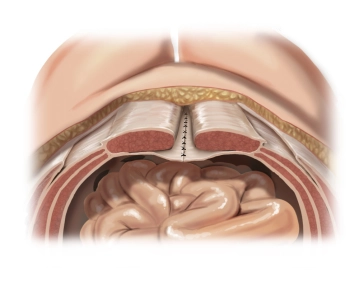
After identical preparation of both sides, the peritoneum or the transversalis fascia is first continuously sutured caudally up to the arcuate line. Subsequently, the posterior layers of the rectus sheath are united by placing individual button sutures using the "pulley technique" with a monofilament absorbable suture of size 1.
Now the augmentation is performed with a synthetic mesh. After trimming, it is placed behind the rectus muscle from cranial retroxiphoid to caudal retropubic.
Note: Due to the unusually slender rectus muscle, only a relatively narrow mesh can be used.
Fixation is not absolutely necessary. However, in this case, marginal fixation was performed because two meshes had to be placed overlapping.
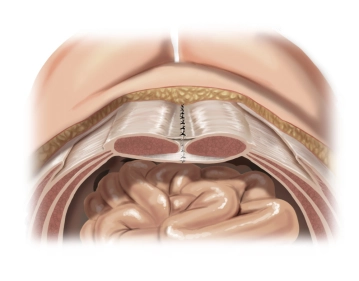
Next, the anterior layer of the rectus sheath is united with the opposite side after median displacement. This is done with pre-placed single button sutures using monofilament non-absorbable suture material of size 1. Then, any excess skin is resected.
After checking for blood dryness and, if necessary, extensive hemostasis, four subcutaneously placed Redon drains are initially inserted with drainage into each of the four quadrants. Subsequently, subcutaneous suturing and skin closure with staples.
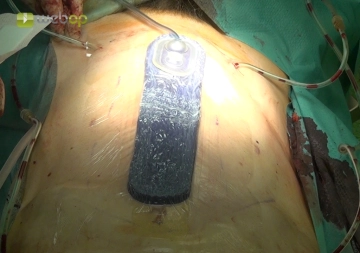
In the present case, the final wound coverage is performed using a wound vacuum system, which allows for optimal wound drainage in a closed environment.