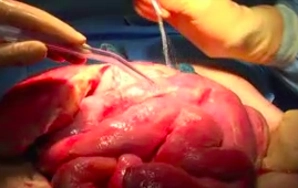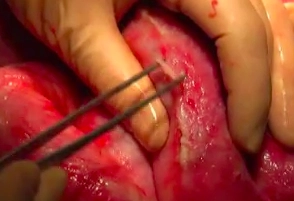
After removing the old vacuum dressing, disinfecting, and sterile draping of the surgical area, the inspection of the abdomen and the release of adhesions between the intestinal loops are performed.
-
Inspection and Adhesiolysis
![Inspection and Adhesiolysis]()
Soundsettings -
Lavage
![Lavage]()
Soundsettings Extensive rinsing and lavage of the abdomen.
Tip: Depending on the local findings or underlying disease, the procedure may need to be extended.
-
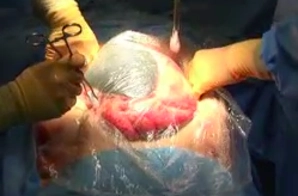
Insertion of the Intra-abdominal Component
![Insertion of the Intra-abdominal Component]()
Soundsettings Moisten the intra-abdominal component (perforated film with integrated sponge) of the vacuum system and insert it into the abdomen using moist swabs.
Tip: Ensure that the film is inserted as deeply as possible into the abdomen and separates the abdominal wall from the intestines. In the area of the liver and the ligament or a stoma, the intra-abdominal film may need to be incised to be placed well and without folds into the depth.
-
Insertion of PU Sponges
Soundsettings Insertion of the black polyurethane sponges at the level of the abdominal wall.
Important: It is crucial to ensure that the sponge is positioned at the level of the abdominal wall, thus avoiding placement below the fascia (risk of small bowel injury upon dislocation) or above the skin (skin damage). Overall, the black sponge should be smaller than the abdominal wall defect to prevent excessive fascial retraction. The pre-made "break points" facilitate correct size adjustment. It is important to ensure that the sponge is not trimmed over the abdomen, as small pieces could otherwise enter intra-abdominally.
-
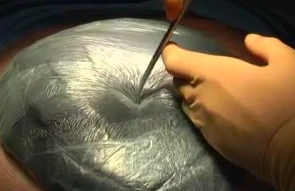
Applying the Film
![Applying the Film]()
Soundsettings Cover the surgical field using self-adhesive film and cut a hole at least 2.5 cm in size in the film directly over the black sponge.
Important: the film must seal the entire abdomen airtight and ensure that the black sponge is positioned at skin level.
Tip: To facilitate wrinkle-free application, the film can be cut into narrow strips.
-
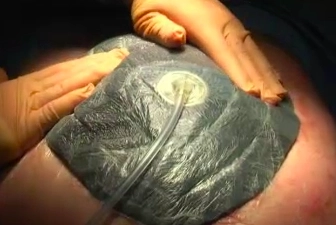
Application of the T.R.A.C.® System
![Application of the T.R.A.C.® System]()
Soundsettings Application of the T.R.A.C.® System to the previously applied hole, connecting the T.R.A.C.® System to the canister of the V.A.C.® (Vacuum assisted closure) pump, and initiation of therapy (continuous/ - 125mmHg). During this process, the sponge can still be shaped as desired.