
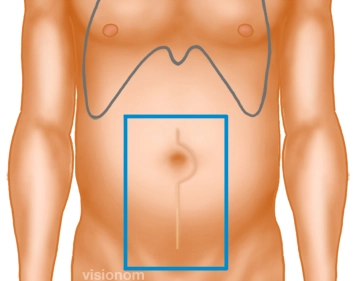
Before establishing the pneumoperitoneum, the overlap of the scar is marked in all directions, thereby determining the size of the mesh. The fascial defect predominantly extends to the right, making an asymmetrical placement of the mesh necessary in this case.
-
Determining the Mesh Size
![Determining the Mesh Size]()
Soundsettings -
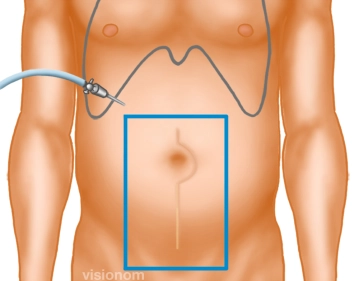
Creation of Pneumoperitoneum, Inspection of the Abdominal Cavity
![Creation of Pneumoperitoneum, Inspection of the Abdominal Cavity]()
Soundsettings After previous gynecological surgery via a midline lower abdominal laparotomy, creation of a puncture pneumoperitoneum in the anterior axillary line subcostally in the untouched right upper abdomen with the Veress needle, alternatively a mini-laparotomy can be performed. Then insertion of the first or camera trocar and inspection of the abdominal cavity.
Note: In cases of incisional hernias following midline upper abdominal laparotomies, a mini-laparotomy in the right or left lower abdomen is recommended as the primary approach.
-
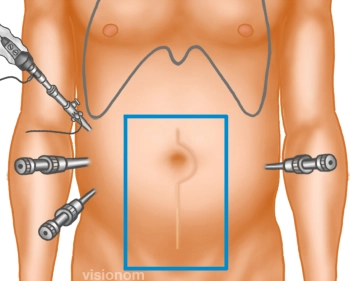
Insertion of Trocars
![Insertion of Trocars]()
Soundsettings In the right mid and lower abdomen, the two 10 and 5mm working trocars are now inserted outside the planned mesh position. Placement of another 5mm trocar on the left side.
Note 1: In cases of previous surgeries that suggest a free upper quadrant on the left, a mirror-image arrangement should be considered.
Note 2: In principle, 3 trocars are inserted in the anterior axillary line on one side and a fourth trocar on the contralateral side.
Adhesiolysis
After establishing the pneumoperitoneum and inserting the trocars, adhesiolysis represents the most
After establishing the pneumoperitoneum and inserting the trocars, adhesiolysis represents the most
Activate now and continue learning straight away.
Single Access
Activation of this course for 3 days.
US$9.30
inclusive VAT
Most popular offer
webop - Savings Flex
Combine our learning modules flexibly and save up to 50%.
from US$7.23 / module
US$86.85/ yearly payment
general and visceral surgery
Unlock all courses in this module.
US$14.47
/ month
US$173.70 / yearly payment
Webop is committed to education. That's why we offer all our content at a fair student rate.