Laparoscopic spigelian herniorraphy - general and visceral surgery
You have not purchased a license - paywall is active: to the product selection
Positioning, skin incision, pneumoperitoneum
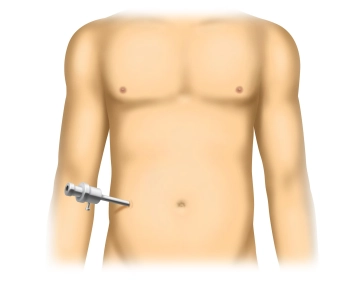
Position patient supine on OR Table, skin prep and drape (sterile!): Entire abdomen from costal arches to symphysis pubis. Incise skin on opposite side of hernia and enter abdomen in open fashion. Bluntly insert the 10 mm trocar and accomplish the pneumoperitoneum with an intra-abdominal pressure of about 12-15 mmHg.
Note:
It is up to the surgeon how he/she gains access to the abdomen. Open access is preferred. Because of numerous unnoticed injuries with at times lethal outcome, medical experts in legal proceedings have become more and more wary of the Verres needle.
Inserting the laparoscope and working trocars
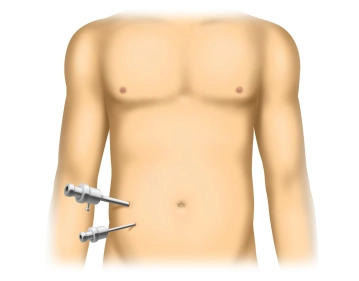
Insert the laparoscope with the camera and inspect for possible injury and bleeding: In particular, carefully check for any adhesions in the immediate vicinity. Laparoscopic overview: Inspect all organs and look out for any pathologies. Insert the first 5 mm trocar. Always do this under visual camera control to minimize any risk of injury. The surgeon will determine the exact location based on his/her experience and preference. The second 5 mm working trocar will be inserted later on.
Inspecting the hernia orifice
Determining the size and position of the hernia orifice
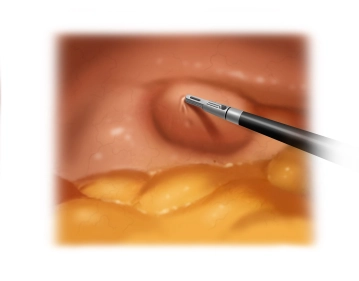
Mark the center of the hernia orifice with a percutaneous needle. The exact location of the center of the hernia orifice must be known because otherwise it is impossible to determine the required size of the mesh. First, gently free any omentum or intestine incarcerated in the hernia. Carefully measure the exact diameter of the hernia orifice. Determine the precise edges of the hernia with the needle and mark them on the skin.
Choosing the best mesh size
Position the second 5 mm trocar under visual camera control. After having marked the precise edges of the hernia orifice on the skin, determine the best size of the mesh. The mesh should overlap the outer edge of the hernia orifice by at least 5 cm on all sides. Mark the mesh diameter and the puncture sites for the stay sutures on the skin. This ensures that the stay sutures arming the mesh will exit at exactly as planned and that the mesh will best cover the hernia orifice.
Mesh positioning
Arm four corners of the mesh with four monofilament stay sutures. These stay sutures help to extend the mesh later on and temporarily anchor it across the hernia orifice. Furl up the mesh and introduce it through the 10 mm trocar. Depending on the size of the mesh, this may present some problems. When furling up the mesh, the stay sutures must remain on the inside and should not protrude. If the trocar is too small, replace it with a 12 mm trocar or try to insert the mesh percutaneously without the trocar in site.
Unfurl the mesh with the graspers and roughly position it across the hernia orifice. Now adjust its position with the graspers such that its center matches the center of the hernia orifice.
Mesh fixation
Through stab incisions at the previously marked skin locations recover the stay sutures at the four corners of the mesh. Catch the stay sutures with the suture catcher, pull them through the abdominal wall and clamp them.
Once the stay sutures have been tightened, contour the mesh precisely to the abdominal wall with graspers.
Lower the intra-abdominal pressure to about 8 mmHg and tighten the mesh. This step reduces the concavity of the abdominal wall, caused by the intra-abdominal pressure, and ensures that the mesh will not crease later on.
Fixate the mesh in circular fashion with helical hernia tacks: Placing the helical tacks at about 1-2 cm intervals prevents any intestinal loop or omentum becoming incarcerated between the mesh and the abdominal wall. At the same time the tacks ensure solid mesh fixation. Optionally, a second spiral of helical tacks can be stapled directly to the edge of the hernia orifice.
Trimming the stay sutures, removing the trocars, bleeding off the pneumoperitoneum
Trim the stay suture such that they will rest subcutaneously. The stay sutures hardly increase the strength of fixation and may cause significant postoperative pain at times.
Bleeding off the peritoneum: This is done under visual camera control to check the position of the implant. Before this step, remove the 5 mm trocars under visual camera control to check for any possible bleeding. Let the pneumoperitoneum escape completely, since any gas remaining in the abdominal cavity causesd postoperative pain.
Fascia sutures, skin sutures, dressing
Close the fascia at the site of the 10 mm trocar. In order to prevent any incisional hernias, trocar access sites > 5 mm should be closed with slowly absorbable sutures. Extreme care must be taken not to injure any intestine or include it in the sutures.
Skin sutures and sterile dressing. The skin is closed with absorbable intracutaneous sutures. However, all other standard types of suture are also possible.
webop-Account Single
full access to all lectures
price per month
for the modul: vascular surgery